Sort & Filter

WELCOME
Congratulations on the purchase of your EPA Vertical Bike Rack.
This rack has been designed and tested by a team of engineers and by Ebikes Parts and Accessories (EPA), a company active in the e-bike industry since 2016, running e-mountain bike tours across Australia and Europe.
The experience gained from these tours—especially over harsh Australian terrains with heavy e-bikes—provided valuable technical insight into developing a vertical bike rack that can withstand even the most extreme conditions.
EPA Vertical Bike Racks are zinc-plated and electro-painted to provide superior durability and long-lasting corrosion resistance.
EPA VERTICAL BIKE RACK COMPATIBILITY
● Mountain bikes (conventional and electric)
● New-generation geometries
● Touring bikes
● Cross-country bikes
● Road bikes, children’s bikes, and fat-bikes (with special accessories available)
For non-standard setups, please contact your dealer for specific solutions.
Once installed and used a few times, you'll quickly recognize how easy it is to operate and how securely it transports your bikes.
Please ensure you read all instructions carefully before use.


GENERAL INFORMATION
● EPA Vertical Bikes assumes no responsibility for:
- Injury to persons.
- Damage to vehicles, cargo, or any personal or real property.
- Loss of profits or other damages resulting from improper assembly or use of the product.
- This includes any use that conflicts with written or verbal instructions from EPA Vertical Bikes or its distributor.
● Do not modify the bike carrier or any of its components in any way.
● If you have any questions regarding operation, usage, or limitations, consult your EPA Vertical Bike Rack dealer.
● Carefully read all instructions and warranty information before installing or using the bike carrier.
INSTALLATION
● The bike carrier must be attached to the vehicle using the self-retractable ratchet straps supplied with the product, and exactly as specified in the instruction manual.
● EPA Vertical Bike Rack is not responsible for any damage to the vehicle area where the straps are fastened, nor for the loss of the load or bike carrier caused by failure or breakage in those areas.
● A minimum clearance of 10 cm must be maintained between the bike carrier and the vehicle.
● Consult your vehicle dealer for recommendations specific to your car model before fitting the bike carrier.
● Check the installation instructions to confirm that you have all necessary parts of the bike carrier.
● Retain all manuals for future reference and safe operation.
● The bicycle carrier must be centered and mounted at the correct height. The lower horizontal tube must be positioned at a 90° angle to the tow ball.
● Read all assembly instructions and any additional recommendations carefully before installation.
● Follow the sequence of installation as shown.
Do not attempt any alternate installation methods not outlined in the instructions.
LOADING INSTRUCTIONS
1. General Loading Guidelines
● Always load bicycles from right to left for ease of access.
● Heaviest bicycles should be placed in the center of the rack.
● Lighter bicycles go on the ends to ensure proper weight distribution.
● If any spaces are free, prioritize central positions to balance the load.
● Distribute the weight evenly to avoid imbalance on either side of the rack.
2. Bike Type Positioning
● Short-stem bikes (DH/Enduro): position on the right side.
● Long-stem bikes (Cross Country /Trail): position on the left side to reduce handlebar interference.
3. How to Load Bicycles
● Muscle bikes: Hold with one hand on the rear swingarm and the other on the back of the fork.
● Electric bikes:
1. Press the rear brake and lift the front wheel.
2. Rest the front wheel on the top horizontal tube (cradle on the right).
3. Push using your knee or hip on the saddle to position the front wheel into the cradle.
4. Pre-Loading Precautions
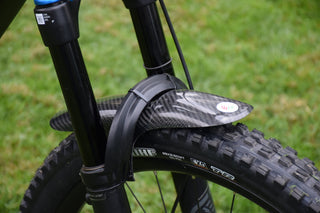
● Remove fork accessories that may collide with the cradle.
● Always install both front and rear wheels aligned as per the manual.
● Tyres must start at the bottom of the cradle to ensure correct tensioning.
5. Weight & Load Limits
Never exceed the lowest of these three values:
● Maximum load of the bicycle carrier (per assembly instructions).
● Maximum load of the vehicle.
● Maximum load of the tow ball ("S" value).
The maximum carrier load applies whether the vehicle is in motion or parked.
Never exceed the maximum weight per bicycle as per installation instructions.
6. Compatibility
● The carrier is designed for standard bicycle frames only.
● Tandem bicycles must not be transported.
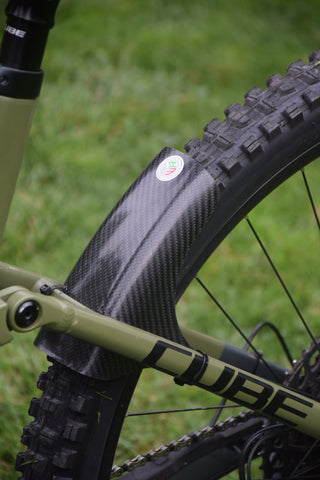
● The correct bike size is when the rear wheel rests on the horizontal down tube.
● If your bike doesn't fit properly, contact your dealer.
Only transport bicycles with the front wheel placed inside the cradle.
7. Safety and Responsibility
● EPA Vertical Bike Rack assumes no liability for damage from improper assembly or misuse.
● Remove all detachable accessories (batteries, child seats, cradles, locks, pumps, etc.) before transport.
8. Vehicle & Legal Considerations
● Deactivate automatic boot/tailgate functions. Open the luggage compartment manually when the carrier is installed.
● Equip the load with appropriate lights, plates, and warning signs per local laws.
● The light holder must be fully visible at all angles.
For vehicles approved after 1 October 1998, ensure the third brake light remains visible from:
● 10° left/right of vehicle axis.
● 10° above and 5° below the horizontal axis.
If visibility is compromised, install an additional third brake light.
9. Documentation
● Keep the installation and safety manual and, if applicable, the ECE type approval in the vehicle with the carrier.
IMPORTANT INFORMATION
Please read the following important notes carefully to ensure safe operation and prevent damage to your vehicle, the bike carrier, or your bikes.
Towball Compatibility:
● This towball-mounted bicycle carrier is not suitable for tow-balls made entirely of aluminium or GGG40 (cast iron).
● The towball must:
o Have a diameter of 50 mm
o Be made of steel, including the cylindrical section 2 cm below the ball
● The towball bracket may be made of aluminium.
Towball Condition:
● Always verify that the towball is:
o Clean
o Free of oil or grease
o Undamaged
● Remove any protective caps or foil coverings before installation. These can negatively impact friction and stability.
Lighting Function Check:
● Before driving, verify that all tail lights, brake lights, and indicators are functioning.
● If using fog lights on the bike carrier, ensure the vehicle's rear fog light is deactivated.
o In most vehicles, this is automatic when the electrical plug is inserted—confirm this function on your vehicle.
Towball Clamping Force:
● If the bike carrier shifts or the clamping handle feels loose, the towball clamping force must be adjusted as per the installation instructions.
● Contact your EPA Vertical Bikes dealer for assistance if needed.
Tilt Mechanism Locking:
● If the bike carrier includes a tilt function for boot access, ensure it is securely locked in the transport position before driving.
Exhaust Clearance:
● Maintain a safe distance between the bike carrier (and bikes) and the exhaust pipe.
● Heat or exhaust gases may cause damage to the carrier or bicycles.
● If in doubt, consult your EPA Vertical Bikes dealer.
Vehicle Restrictions:
● Do not use the bike carrier if your vehicle has:
o A large, plastic, or weak spoiler
o A plastic, glass, or split tailgate
o Manufacturer instructions prohibiting tailgate-mounted carriers
● Car models vary by region. Tailgate accessories like chrome trims or spoilers may interfere with safe use. Do not install the rack on such vehicles.
Rear Wiper Considerations:
● If bike straps or wheels are near the rear wiper, do not use the wiper.
o Deactivate automatic rear wiper operation (e.g., by removing the fuse—refer to your vehicle’s owner manual).
o If necessary, remove the wiper arm.
● Consult your dealer or workshop for specific instructions.
REGULATIONS AND DRIVING CHARACTERISTICS
When using the EPA Vertical Bike Rack, the driver must be aware of the impact on the vehicle’s behaviour, dimensions. The following guidelines ensure safe and lawful operation.
Clearance Awareness:
● Pay close attention to ground clearance when driving over steep driveways, ramps, or uneven terrain.
● Be mindful that bicycles mounted on the rack may protrude above the roofline and could come into contact with overhead obstacles such as garage entrances or low-clearance structures.
Load Security Checks:
● Regularly inspect:
o All load securing devices.
o The tightness of mandatory self-retractable ratchet straps.
o The tightness of the headrest support system.
● Retighten components as needed to maintain stability.
● After installation and every use, verify that pins are fully inserted and locked, even if installed by someone else.
Driver Responsibility:
● The driver is solely responsible for ensuring that:
o The bike carrier is in good condition.
o All parts are securely fastened.
o The load is properly mounted and stable throughout the journey.
Periodic Checks While Driving:
● After traveling approximately 50 km, stop and recheck the security of the bike carrier and its load.
● Continue to check at regular intervals during long trips.
● If you notice unusual noises, vibrations, load movement, or vehicle handling issues, stop immediately and inspect the carrier.
Vehicle Impact Considerations:
● The bike carrier and bicycles may increase the vehicle’s length, width, and weight.
● Use extra caution when reversing, and when entering garages, ferries, or tight spaces.
● Braking and handling characteristics (especially in curves) may be altered.
● The vehicle may be more affected by crosswinds.
Lighting and Visibility:
● Ensure that tailgate lights and license plates remain visible.
● If the bike rack obscures lights or the plate:
o Attach an external light plate with built-in tail lights.
o Reposition any integrated lights on the rack for visibility.
● An additional number plate may be required depending on local laws. Mount it securely to the appropriate location on the bike carrier.
Speed and Driving Conditions:
● Never exceed 130 km/h when using the bike carrier.
● Always adapt your speed to match:
o Road conditions
o Load type
o Wind and weather
o Traffic intensity
o Legal speed limits
● Slow down to 10 km/h or less when crossing speed bumps, ramps, or rough terrain.
Locking and Modifications:
● All bolts, levers, and nuts must be tightly fastened during transport.
● If your model includes a lock, it must be engaged at all times while in use.
o The keys should be stored inside the vehicle during travel.
● Do not modify the product under any circumstances.
● Replace damaged or worn parts only with original EPA spare parts.
Noise and Storage:
● Wind resistance may produce noticeable noise during travel, depending on the vehicle and load.
● For fuel efficiency, environmental impact, and the safety of other road users, remove the bike carrier when not in use.
MAINTENANCE
Regular maintenance of the EPA Vertical Bike Rack ensures optimal performance, safety, and longevity.
Cleaning Instructions:
● Clean the bike carrier regularly using warm water or a mild car shampoo.
● Pay special attention after use in coastal environments or during winter months when road salt is present.
● Remove any build-up of salt, dust, or grime from surfaces and joints.
Lubrication:
● Lubricate the coupling mechanism and other moving parts as needed.
● Do not lubricate or apply grease to the surfaces that come into contact with the towball.
● Clean the towball periodically to ensure it remains free of grease or lubricants.
Storage Guidelines:
● Remove the bike carrier before entering an automatic car wash.
● When not in use, store the carrier in a dry, covered area.
● All components must be stored securely and kept clean according to the instructions.
Spare Parts and Replacements:
● Use only original EPA Vertical Bike Rack spare parts for repairs or replacements.
● Spare parts are available from your dealer or directly from the manufacturer.
● When requesting parts, always provide the product details to ensure accurate and efficient service.
Inspection and Safety:
● Inspect all fixings periodically, and retighten as necessary before use.
● Check for signs of wear, damage, or missing parts and address them immediately.
⚠ Proper maintenance is essential to ensure the continued safety and reliability of the bike rack
INSTRUCTION MANUAL
IMPORTANT: Always select the lower of the two weights—either the maximum load specified by the rack or the vehicle's towing specifications. Never exceed the lower value.


MAX WEIGHT FOR BICYCLE IS 25 KG
HITCH BALL PREPARATION
Before installing the Vertical Bike Rack, it is essential to ensure the hitch ball is clean and free from any contaminants.
Cleaning Requirements:
● The hitch ball must be free of dirt, rust, grease, or any debris that may affect the stability of the bike rack.
● Use a clean cloth and, if needed, a mild degreaser or rust remover to prepare the surface.
● Always dry the hitch ball thoroughly before proceeding with installation.
⚠ Failure to clean the hitch ball may result in reduced grip, instability, or damage to the mounting system.

QUICK COUPLING SYSTEM PROTOCOL
Always keep the quick coupling system locked when in use, and store the key inside the vehicle.
Best Practices:
● Immediately lock the quick coupling system after installation and loading.
● Store the padlock key in a secure but accessible location inside the vehicle.
● Regularly check that the quick coupling system is properly engaged and free of debris.

QUICK COUPLING ADJUSTMENT
1. Tighten the bolt (marked with a red dotted circle) to increase grip on the hitch ball.
2. Apply enough pressure so that closing the quick coupling lever requires approximately 45 kg of force.
3. Once the correct resistance is achieved, securely tighten the locknut to maintain the adjustment.
⚠ Warning:
● Regularly check the locknut to ensure it stays tight.
● Confirm that the tilt-release mechanism operates correctly before each use.
TRAILER SOCKET CONNECTOR
The EPA Vertical Bike Rack comes equipped with a standard 7-pin connector.
If your vehicle is fitted with a 13-pin socket, please contact EPA Vertical Bike Rack or one of our authorized distributors.
13-pin adapter accessories are available and kept in stock.

SAFETY WARNING – REDUCED SPEED
Reduce your speed to 10 km/h when crossing:
● Bumpy terrain
● Unpaved roads
● Speed bumps
This precaution helps protect both the bike rack and your bikes from damage due to sudden shocks or vibrations.


SECURING THE VERTICAL BIKE RACK DURING TRANSPORT
● During vehicle transport, the pins must be replaced with the Bolt and Spacer B to ensure maximum stability of the vertical bike rack.
● Pins are only to be used when the vehicle is parked.
⚠ Warning: Using pins while driving can compromise the safety and stability of the bike rack.
WHEEL SECURING INSTRUCTION
Always tie both the front and rear wheels securely to the rim of the bicycle, and in the correct way as described in the instructions.
⚠ Important: Proper wheel fastening is essential to ensure safety and stability during transport.
EXTRA LOAD PLATE INSTALLATION INSTRUCTIONS
The Extra Load Plate is mandatory when the total payload exceeds 59 kg (refer to value “C” in the weight table for your specific model).
Fitment Requirement:
This accessory must be installed before use when carrying loads over the specified threshold.

Extra Load Plate – Configuration Variations
To ensure a secure and stable installation across all tow hitch designs, the Extra Load Plate can be mounted in two different configurations:

Variation A – Short Neck Tow Hitch
Use this configuration when the tow hitch has a short curved town hitch shape.
To ensure proper fitment and stability of the Extra Load Plate, complete the following steps in sequence:
1. Insert Blocking Bolts:
o Mount bolts No. 5 (blocking bolts) into the inner holes of the plate.
2. Align the Plate:
o Ensure the plate is aligned for maximum surface contact with the vehicle’s tow hitch.
3. Initial Tightening:
o Gently tighten bolt No. 6 until it makes firm contact with the hitch—do not overtighten.
4. Level Adjustment:
o Adjust the level of the plate by sequentially tightening bolts No. 5 to achieve a uniform, flat fit.
5. Secure Outer Bolts:
o Install bolts No. 3 in the outermost holes and tighten them securely to the hitch.
6. Final Tightening & Locking:
o Tighten all bolts to the specified torque settings.
o Install the contra nut on bolt No. 6 to prevent the bolt from loosening due to vibration or use.
⚠ Ensure that the Extra Load Plate is firmly secured and flush with the hitch before loading bicycles onto the rack.
Variation B – Long Neck Tow Hitch
Use this configuration when the tow hitch has a Long Neck Tow Hitch
To ensure proper fitment and stability of the Extra Load Plate, complete the following steps in sequence:
1. Initial Tightening:
o Gently tighten bolt No. 6 until it makes firm contact with the vehicle’s tow hitch. Do not overtighten.
o Install bolt No. 3 in the outermost holes of the plate and gently tighten them to the hitch.
2. Align the Plate:
o Ensure the plate is properly aligned to achieve maximum surface contact with the hitch.
3. Level Adjustment:
o Adjust the level of the plate by sequentially tightening bolts No.6 and 3 to ensure the plate sits flat and even against the tow hitch.
4. Final Tightening & Locking:
o Tighten all bolts to the specified torque values.
o Install the contra nut on bolt No. 6 to prevent the bolt from loosening due to vibration or use.
⚠ Always verify that the Extra Load Plate is securely mounted before loading bicycles.
MANDATORY USE OF SELF-RETRACTABLE RATCHET STRAPS
To ensure safe and secure installation, the bike carrier must be attached to the vehicle using the self-retractable ratchet straps provided with the product.
Attachment Guidelines:
● Straps must be installed as instructed in this manual.
● They may be secured to hinges, roof racks, or any structurally strong part of the vehicle.
● If no suitable attachment point is available, use the optional accessory components (refer to Image 1) designed to be mounted on the tailgate of the vehicle.
Quantity and Placement:
● Two straps are required per bike carrier unit.
● For carriers designed to hold six bicycles, it is recommended to install two additional straps on the lower bar—where the rear bicycle wheels rest—for extra stability.
Failure to use the provided ratchet straps properly may compromise the safety and functionality of the bike carrier.


VERTICAL BIKE RACK POSITIONS FOR ACCESSING THE VEHICLE REAR DOOR OR BOOT
POSITION 1:
Allows access to the vehicle boot or the upper section of a two-piece tailgate (split-gate).
POSITION 2:
Provides full access to the vehicle boot. Compatible with both two-piece (split-gate) tailgates and full tailgate systems, including top-hinged liftgates or rear swing-out doors (vans).
POSITION 3:
Workshop mode for bicycle maintenance. For optimal operation, apply grease to the stainless steel pins.
POSITION 4: Bicycle parking position
In this position, the rack can be used to park bicycles when not in transit.
To lower the rack into the parking position:
● Remove Bolt and Spacer B.
● Gently lower the rack until the cradles make contact with the ground.
● If the cradles do not reach the ground, use a stable support to ensure proper positioning and safety.
⚠ Warning:
Before driving, Bolt and Spacer B must be reassembled to secure the rack in the upright travel position. Failure to do so may result in instability or damage during transport.


BICYCLE LOADING GUIDELINES
The EPA Vertical Bike Rack is engineered with multiple tilt and pivot positions to allow for effortless bicycle loading. This feature reduces physical strain during the process, making it easier and safer for users of all experience levels.
● Simply tilt the rack down to Position 1 and/or Position 2.
● Engage the bicycle rear brake and lift the front wheel upward.
● Then, rest the front wheel on the support bar and gently guide it into the cradle.
⚠ Important: Ensure that the rear wheels of all bicycles remain in contact with the ground during loading.
This minimises stress on the rack structure and prevents potential damage or instability.
To ensure safety, stability, and ease of use, always follow these best practices when loading bicycles onto the EPA Vertical Bike Rack:
1) Load from Right to Left
Always begin loading bicycles from the right of the rack and progress toward the left for easier access and alignment.
2) Position the Heaviest Bicycles in the Center
Mount heavier bicycles in the central positions of the rack to maintain structural balance and minimise strain.
3) Place Lighter Bicycles on the Ends
Position lighter bicycles toward the outer edges of the rack to ensure proper weight distribution.
4) Fill Central Spaces First if Not Fully Loaded
If not using all cradles, prioritize loading the central positions to maintain rack equilibrium.
5) Ensure Even Weight Distribution
Avoid loading all weight on one side. Distribute bicycles symmetrically to prevent imbalance during transport.
⚠ Warning: Always follow the operating instructions to unlock, tilt, and reposition the rack safely. Ensure the rack is securely latched and Bolt and Spacer B have been reassembled before driving.
PARKING POSITION – STABLE & SPACE-SAVING STORAGE
When not in use, the vertical bike rack can be easily detached from the vehicle and stored without hassle. It is specially engineered to remain stable and upright when placed on level ground, eliminating the need for additional support. Thanks to its self-supporting design, the rack doubles as a free-standing bike holder, making it perfect for use inside your garage or storage space. This feature adds value by turning your rack into a practical indoor bike stand when not on the road.
WARRANTY
EPA Vertical Bikes products are covered by a limited one-year warranty from the date of purchase by the original buyer.
Warranty Coverage:
● Covers defects in materials or workmanship under normal usage conditions.
Exclusions:
● Warranty is void if the product:
o Has been modified
o Was improperly maintained
o Was used with non-original parts
This warranty is non-transferable.